NEATER EATER ROBOTIC HELP

Click to play Introductory videoPlay video icon

Click to play Quickstart guide Play video icon

QR code to read instructions online Scan QR code to read these instructions online on your phone

These instructions are also available on our website: www.neater.co.uk

A paper copy of these instructions will be provided free of charge within 7 days upon request via info@neater.co.uk

The Neater Eater is simple to use. On-screen pictures and videos guide you through choices to best suit you. Press the ? Button to get help. Press and hold to watch helpful videos.

Video captions (subtitles) can be enabled in Device Settings.

We encourage you to have a play pushing buttons and trying different options.

With voice control enabled, say Neater help or Robot help to open help document where you can navigate by saying: Top, Next, Speed Up, Slow down, Scroll up, Scroll down, Exit, Stop.

With voice control enabled, say Neater help or Robot help to open the menu of help videoes.

Troubleshooting robot icon

Problem? Ensure robot and tablet are charged. Hold wake/sleep button on tablet until it vibrates. Hold Robot Power Button until light goes out. Press power button again to light it up. Wait two minutes.

Click to play video Play video icon


CONTENTS

1.1 INTENDED PURPOSE / INTENDED USE

Click to play videoPlay video icon

The Neater Eater Robotic is an assistive feeding device designed to enable adults and children with upper limb mobility impairments, tremors, weakness, or a reduced range of motion to feed themselves independently.

The device helps provide nutrition, independence and dignity to users. It reduces reliance on carers and can help social inclusion at mealtimes. It should only be used to assist the eating of consumable foods or for holding safe, light objects.

The Neater Eater Robotic is classified as a Class I Medical Device in accordance with the UK Medical Devices Regulations 2002 (UK MDR 2002) and the EU Medical Device Regulation (MDR 2017/745).

1.2 CONTRAINDICATIONS & USAGE WARNINGS

1.3 INTRODUCTION

Click to play videoPlay video icon

Neater Eater robot icon

The Neater Eater Robotic enables you to feed yourself. It is simple to use with a range of features to help you enjoy meals. The Neater Eater can learn 5 different sets of feature choices for different profiles or situations.

To control your Neater Eater you can use the (touch screen) tablet included, built in voice control and/or optional switches can be plugged in. The screen is used to choose features and teach Neater Eater where your mouth is.

The tablet is held by magnets to the front of the Neater Eater. Just pull it off if you want it somewhere more convenient.


1.4 POWER AND BATTERIES

Click to play video Play video icon

Battery charging motor icon

The battery inside the Neater Eater is recharged by plugging in the power supply at the back. Leave the Neater Eater plugged in overnight to recharge every night. A green LED shows external power is plugged in. An orange LED shows the battery is charging. If the green LED is lit and the orange LED is not lit, then the battery is fully charged. You can use the Neater Eater whilst it is charging.

If the Robot battery is not charged for a long period of time and the orange LED doesn’t stay on when powered, reset the battery charging: With the robot plugged in, press a pin into the hole near the power socket for 30 seconds, three times. This resets a protection circuit that may have disconnected the batteries.

The battery inside the tablet charges automatically when it is held by the magnets onto the front of the Neater Eater. (Requires external power plugged into the robot or the robot batteries much higher charge than the tablet batteries.) Plug the robot into external power before switching it off in order to ensure recharging of the tablet.

A red LED at the back of the Neater Eater shows power is being supplied to the tablet charger (even when the Neater Eater is switched off). A red LED on the tablet shows it is charging. A green LED on the tablet shows when it is fully charged. Leave the tablet on the front of the Neater Eater when not in use to recharge its battery.

The blue LED at the back of the Neater Eater indicates Bluetooth connection to the tablet.

If the Neater Eater is idle for 15 minutes it will automatically start to shutdown to save energy. This feature can be switched off. Jump to Menu Access

Tablets left in direct sunlight can overheat which reduces battery life. It is recommended not to use the tablet above 35°C. If the battery swells, the tablet must be safely disposed of - contact your local waste recycling facility for advice.

1.5 SWITCH ON AND OFF

Click to play videoPlay video icon

Power switch on and off icon

To switch on:

1. Press the button on the front of the Neater Eater Robot.

2. The screen should wake up automatically when it detects the robot has started.

(If the tablet does not wake up straight away, it has powered down. Make sure the tablet has been charged to at least 5% and hold its power button down until the screen switches on. It may take a few minutes to start.)

To switch off:

1. Hold the button on the front of the Neater Eater Robot for 1 second.

2. After a while the screen will sleep automatically.

(You can press the power button on the tablet if you want to sleep it straight away.)


1.6 WHEN YOU FIRST SWITCH ON

Click to play videoPlay video icon

The first time you switch on the Neater Eater it plays a video introduction on the tablet. (You can choose for this not to play in the future.) You can adjust the volume on the tablet.

User name profile icon

Your Name

If the Neater Eater has not been used before, your screen name will be “Neater”. You can change this in the Select Profile menu.

Plug on the spoon icon

Plug on the Spoon

If there is no spoon (or other cutlery) fitted, a video plays showing you how to fit the spoon. A hidden switch tells the Neater Eater when the spoon is properly plugged on.

Teach mouth position icon

Your Mouth

The spoon then moves towards your mouth - to where the Neater Eater was last taught to go. If the spoon touches something (such as your mouth) on the way, it will sense this and stop. The screen then invites you to choose to continue or to teach the Neater Eater where your mouth is. It also asks if you need to change the selected profile - if it is not your name on the screen. Jump to Teaching Mouth Position

Fit the plate icon

Fit the Plate

Plates for the Neater Eater have a peg on the bottom that locates in the hole on top of the Neater Eater. A video plays showing you how to fit the plate and make sure food is chopped up for scooping. When you click continue on the screen or the external switch 1, you are asked to confirm which plate has been found or choose from a list. (Choices can also be made using the external switches.) You are then ready to eat.

2.1 SIMPLE EATING

Click to play video Play video icon

Press the buttons on the screen or use the external switches to control the Neater Eater.

Troubleshooting robot icon

PROBLEM? Ensure robot and tablet are charged. Hold wake/sleep button on tablet until it vibrates. Hold Robot Power Button until light goes out. Press power button again to light it up. Wait two minutes.

Click to play videoPlay video icon


Turning the plate counter-clockwise icon

Turning the Plate

The middle button (or external switch 2) is used to turn the plate to align food with the spoon for scooping. Usually this is set to turn in alternate directions but can be set to turn one way only. The plate can also be set to turn automatically between spoon scoops. Jump to Plate Turn Settings

Partitioned plate turn clockwise icon

If the partitioned plate is fitted, the plate automatically turns a little bit each spoon cycle to reach food not yet scooped. Clicking the plate turn switch turns it to the next partition. Holding the plate turn switch can be used to turn the plate accurately to align food for scooping. This feature is enabled in Partitioned Plate Settings.


Play button for scooping food icon

Scooping Food

The left button (or external switch 1) is used to play and pause movement of the spoon. It can be set to wait before it is possible for another cycle to start to ensure time enough to chew and swallow your food. Jump to Wait Settings

Pause button icon

If you can access only one switch, the Neater Eater can be set so that when the spoon is at rest, if you press the plate turn switch, a cycle of the spoon will start. Jump to Scoop Settings


Voice control microphone icon

With voice control enabled, try saying the text displayed on the tablet's buttons to operate your Neater Robot, such as Scoop Food. Jump to Voice Control


2.2 ACTIVATING EXTRA FEATURES WHEN SPOON IS AT REST

Spoon scooping icon

The right hand on-screen button and external switch 3 can be used to operate additional features (if enabled in Scoop settings. )


Fork stab icon

If a fork and/or snack holder is enabled in Scoop Settings , pressing the button will alternate between Spoon scoop and Fork modes (and Snack mode if enabled too.) The robot arm movements and options change to suit.


Snack holder attachment icon

If a fork and/or snack holder is enabled in Scoop Settings , pressing the button will alternate between Spoon scoop and Snack modes (and Fork mode if enabled too.) The robot arm movements and options change to suit.


Plate scrape mode icon

Plate Scrape mode can be activated by pressing and holding until the Plate Scrape icon appears. Then press Play to scrape up the last bits of food. The plate rotates continuously as the spoon scrapes across the plate to bring together food. Only use this when just a small amount of food is left in the plate.

Plate Scrape mode will be activated automatically at the end of the meal if Auto Plate Turn has been selected or if 1-switch or 2-switch modes have been selected. (The plate will already have been scooped many times).

Settings menu options icon

Pressing and holding for longer will make the menu icon appear.
If enabled in More Settings, this allows access to the settings menus using external switches. See External Switch Menu Access for instructions.


2.3 ACTIVATING EXTRA FEATURES WHILST EATING

Click to play videoPlay video icon

The right hand on-screen button and external switch 3 can be used to operate additional features if enabled in Scoop Settings. Most features can also be set to occur automatically every cycle of the spoon even if the button is not enabled. Jump to More Scoop Settings

Scoop less food icon

Scoop Less Food

If food is sticky or is in a big pile, you can scoop less food by pressing this button to move the spoon back a bit from the edge of the plate before lifting up.

Spoon wipe icon

Spoon Wipe

If there is sauce dripping from the underside of the spoon, you can wipe it off against the plate edge. The plate turns round to roughly where the food was scooped from so as not to mix different food types in the plate.

Spoon empty icon

Spoon Empty

If you don't want to eat the food on the spoon (or fork), you can empty it before the next mouthful. The plate turns round to roughly where the food was scooped from so as not to mix different food types in the plate.

Fork wipe empty icon

Fork Wipe Empty

If you don't want to eat the food on the fork you can wipe it off before the next mouthful. The plate turns round to roughly where the food was scooped from so as not to mix different food types in the plate.

Sauce dip partition icon

Sauce Dip

The partitioned plate has a space in the middle for sauce that you can dip into.


2.4 VOICE CONTROL

Enabling voice control allows you to operate your Neater Robot by simply speaking the text displayed on the tablet's buttons. For instance whilst eating, the button labelled Plate Left/Right will turn the plate to the right a little if you say Plate Right (the angle of rotation is as set for auto plate turn ).

When the robot asks you a question or gives you information, saying Neater continue or Robot continue will usually confirm and continue onto the next stage.

Be aware there is a danger of false actions being triggered by voice control especially if you add one-word alternative custom commands. This could mean food being scooped when you haven't finished chewing and swallowing the last mouthful. Don't be tempted; take care!

There are additional hidden voice commands you can say including: Turn the plate starts continuos rotation of the plate until you say: Stop. Quarter turn, Third turn and Half turn turn a quarter, third or half a turn.
"Select fork, Select snack select fork or snack mode if the options have been enabled."
Select plate scrape can be used at the end of your meal to scrape the plate.
Neater help or Robot help open help document where you can navigate by saying: Top, Next, Speed up, Slow down, Scroll up, Scroll down, Exit, Stop.
Neater videos or Robot videos open the menu of help videos.

Speech control can be paused ❙❙ and un-paused ► by pressing the symbol next to the display. This is also possible using remote switches (contact your Neater dealer). Speech control is paused sometimes, for instance in Advanced Settings. Text ending with the symbol | cannot be used for voice control.

New profiles can switch on voice control by saying "voice control" when prompted on start up. You can also switch on voice control in this menu without speaking and then customise your voice commands.

Voice control on the Neater Eater Robot is very responsive as it does not rely on wifi connection and because command words are limited. It may mishear/misinterpret some of your words, in which case you can customise voice control to understand your voice better or to respond to alternative words of your choosing.

Customising Voice Control

Custom voice control settings icon

Voice commands can be customised to help the Neater Eater Robot understand you better or to use words you prefer (they can be anything).
Follow these steps:
1. Press Custom Voice Control|
2. Use the search function or scroll to find the text you want to add or remove custom alternatives to. (The list shows common commands at first but can be expanded to show all.)
3. Use + to add and x to remove. Speak the alternatives you want to add. When there is an alterative added, you can deactivate the original command.

When adding words or phrases, ensure you are in a quiet environment. Be silent for a few seconds before recording.

Voice control may interpret your words differently from how you expect. For instance, when you say: "scoop food" it may interpret this as "skip food". Just accept voice control's interpretation and add it as a customised command. As long as the interpretation of your words is consistent, it will work. You can even teach commands by speaking in different languages and just accept the interpretation.

Blocking words to stop false actions

False actions can arise if Voice control misinterprets words not normally used as command words. For instance, if you say "settee" it may interpret this as "settings". You can stop this easily by adding words that will then be recognised for what they are rather than being misinterpreted as Neater command words. (Also see previous section on adding and removing words to customise commands.)
1. Press Custom Voice Control|
2. Press Blocked Words
3. Speak the words you want to add in order to stop false actions from those words being misheard. Only words that are NOT used as voice commands can be added
4. You can use x to remove blocked words.

3.1 SETTINGS MENU

Click to play video Play video icon

Settings menu options icon

You can access settings when the spoon is at rest by pressing the settings on-screen button.

If external switch menu access is enabled, you can also access the settings by holding external switch 3 until settings menu appears and pressing external switch 1. See External Switch Menu Access for instructions.

You can choose to lock the settings menu with a PIN code to stop others changing your settings.

Settings Menu:

Check mouth position icon

Check Mouth Position


Check plate icon

Check Plate


Wait times between scoops icon

Wait Times


Scoop settings menu icon

Scoop Settings


Plate turn settings menu icon

Plate Turn Settings


More settings options icon

More Settings


3.2 CHECK MOUTH POSITION

Click to play videoPlay video icon

Check mouth position icon

MOUTH POSITION

Press the on-screen button to quickly learn a new mouth position.

Move spoon by hand icon

A video plays asking a helper to move the spoon by hand to the best position for your mouth. Hold the robot arm, not the spoon.

The spoon's angle is fixed to best suit most profiles.

To allow spoon angle adjustment, first enable it in More Settings.

The robot arm has a wide range of movement. If your mouth position is outside the allowed range, you may have to move yourself or the robot for instance by putting something underneath it to raise it higher (screw-on raising spacers can be supplied). Please ensure the set up is stable.

Save position icon

Press the on-screen button (or external switch 1) to save and “Yes” (or external switch 1) to confirm.

If external switches are used or the on-screen Mouth Position button pressed for a long time, then mouth position is checked just as it is at start up:

The spoon then moves towards your mouth - to where the Neater Eater was last taught to go. If the spoon touches something (such as your mouth) on the way, it will sense this and stop. The screen then invites you to choose to continue or to teach the Neater Eater where your mouth is. It also asks if you need to change the selected profile - if it is not your name on the screen.

Learn mouth position by switch icon

Learn by Switch

Learn by switch allows you to use the on-screen buttons or external switches to move the spoon up and down and backwards and forwards to position before you then click to save the position. You can change the spoon's position but NOT its angle.

Voice control microphone icon

With voice control enabled, say: Up, Down, Backwards, Forwards to move the spoon in small steps.


3.3 SELECT PLATE

The Select Plate routine starts by playing a video to remind you to fit the plate and chop up the food for being scooped. You then select the plate you have fitted.

If the Partitioned plate is found or selected the Neater Eater turns the plate and uses its sensors to find the partitions (Partitioned Plate feature must be enabled - contact your Neater supplier for details). Once the plate is selected the Neater Eater moves to the eating cycle.

The plate options are: Large, Small (ceramic or plastic), Medium (plastic), Heated, Bowl and Partitioned. If the partitioned plate is selected, the Neater Eater moves to detect the position of the partitions.

The last plate you used is highlighted. Plates can be selected using the external switches as well as the tablet.

Large plate selection icon Large Plate
Small plate selection icon Small Plate
Medium plate selection icon Medium Plate
Heated plate selection icon Heated Plate
Soup bowl selection icon Soup Bowl
Partitioned plate selection icon Partitioned Plate

3.4 WAIT TIMES

Click to play video Play video icon

Time at mouth adjustment icon

Time at Mouth

The time the spoon waits at your mouth for you to take food off the spoon can be adjusted (1 to 99 seconds).

Wait times between scoops icon

Time between Scoops

To be sure that you have time to chew and swallow food between scoops of the spoon you can set a wait time between scooping cycles. This time can be used to turn the plate and line up food for the next scoop.

Anti-tremor time adjustment icon

Anti-Tremor Time

The Neater Eater has an anti-tremor feature: After clicking play, the pause button cannot be operated for a short time to avoid accidentally pausing scooping. Similarly this button delay can stop you accidentally re-starting scooping when you have paused it. The time can be adjusted.

Time at plate edge adjustment icon

Time at Plate Edge

The spoon waits a small time at the edge of the plate. This gives you an opportunity to pause the spoon there so that you can turn the plate as a way of helping scoop the food.

Plate speed delay adjustment icon

Plate Speed Delay

When the plate turn button is pressed, the plate starts by turning slowly then after a delay time it speeds up. This is so that you can turn the plate a small amount accurately but turn it a long way without having to wait a long time. Increase the delay time if you find it difficult to let go of the plate turn switch quickly.


3.5 SCOOP SETTINGS

Click to play videoPlay video icon

Scoop settings menu icon

The Neater Eater has a range of features. Most features can be set to occur automatically or be restricted to suit your requirements.


Auto spoon wipe setting icon

Auto Spoon Wipe

Wipes drips off from the underside of the spoon against the plate edge every cycle. The plate turns round to roughly where the food was scooped from so as not to mix different food types in the plate.

No spoon pause setting icon

No Spoon Pause

Prevents being able to pause the spoon cycle. Some people find it easier to understand when the first button can only be used to start the spoon cycle not pause it. If you inniate the spoon cycle you will not be able to pause, this comes with associated risks.

Plate jiggle setting icon

Plate Jiggle

If plate jiggle is selected, the plate jiggles a little bit each way as the food is scooped against the edge of the plate in order to help scoop sticky food.

Auto scoop less food setting icon

Auto Scoop Less Food

If food is sticky, or often gathers in a big pile, choose this option to scoop less food than would normally be scooped up.

The Neater Eater knows how many times it has scooped from the current section of the plate and adjusts its scooping action automatically to suit. (This mode uses four different scooping actions instead of the usual two and includes moving away from the plate edge at first before lifting up so as to scoop less food.)

Always scoop from centre setting icon

Always from Centre

Select to ensure the spoon always scoops from the centre of the plate. This is NOT recommended as too much food can be scooped onto the spoon.(It is usually better to allow the spoon to scoop near the edge of the plate before later scooping from the centre. The Neater Eater knows which sections of the plate have been scooped.)


More scoop settings icon

Select this option to enable more scoop settings detailed below:


3.6 MORE SCOOP SETTINGS

Click to play video Play video icon

Video about switches Play video icon


External switch connection icon

To support individual needs, the Neater Eater offers a range of switch modes. External switches, such as foot or head switches, can be connected to the sockets at the back of the Neater Eater Robotic to replicate the functions of the on-screen buttons. The system can be operated with a single switch or multiple switches, using either simple modes with limited options or advanced modes that provide greater control—even with just one or two switches.


Single-switch options

If you need to use the robot with a single external switch you have 3 options:

Simple single-switch mode icon

Simple: Leave all functions showing on screen and just plug a single switch into socket 1. This switch will only start or pause a spoon scoop cycle. The plate is set to turn a little with each scoop, you can change this in auto plate turn. (Other functions are available on-screen or using external switches plugged into the other sockets.)

Dedicated single-switch mode icon

Dedicated: Use a single button in the middle of the screen and/or a switch plugged into socket 2. This turns the plate. It also scoops the spoon when the spoon icon shows after a wait time at rest. Other options are not shown.

Enhanced single-switch mode icon

Enhanced: Use a single button on the right of the screen and/or a switch plugged into socket 3. As well as plate turn and spoon scoop functions, other options such as scoop less food, spoon wipe and spoon empty can be used as they appear on-screen.

Two-switch options

If you need to use the robot with a two external switches you have 3 options:

Simple two-switch mode icon

Simple: Leave all functions showing on screen and plug switches into sockets 1 and 2. You can use one switch to play/pause scooping and one switch to rotate the plate. (Other functions are available on-screen or using external switches plugged into the other sockets.)

Dedicated two-switch mode icon

Dedicated: Plug switches into sockets 1 and 2. One switch controls start/pause scooping, and the other rotates the plate. Other options are not shown.


Enhanced two-switch mode icon

Enhanced: Plug switches into sockets 2 and 3. One switch controls start/pause scooping and plate rotation, while the other provides access to additional functions such as scoop less food, spoon wipe, and spoon empty, as they appear on-screen.

Three-switches (default)

Three-switch default mode icon

If you plug external switches into 1, 2 and 3 the switches will mimic the screen. One switch is play/pause scooping, the next is plate rotate and the next is accessing additional features, described below. This mode is required to access menus using external switches.


Plug on the spoon icon

Spoon Switch

By default, the Neater Eater reacts when the spoon is unplugged, asking you to plug the spoon back on. This feature can be de-activated by pressing Options after closing this help screen.

Snack holder attachment icon

Enable Snack

Select this option to enable use of the Snack Holder attachment for the Neater Eater.

Note: Even if Snack is enabled, the spoon should be fitted when programming the mouth position.

When the Neater Eater is at rest, the right hand button or external switch 3 is tapped to select the snack mode. Tap it again to revert to scooping mode. Play then brings the snack to your mouth. (For use with optional snack holder.Lower mouth positions may be restricted.)

Fork stab icon

Enable Fork Stab

You must have full control of your head movement and be sure use of a Spork is safe for you.

When the Neater Eater is at rest, the right hand button or external switch 3 is tapped to select the stab mode. Tap it again to revert to scooping mode. The Spork is recommended as it is good for both stabbing and scooping food.


3.7 PLATE TURN SETTINGS

Click to play videoPlay video icon

Standard left right plate turn icon

Standard Left Right

The default setting for plate turning is alternate directions

Plate turn right only icon

Plate Turn Right Only

The plate will only turn from the right.

View before scoop plate turn icon

View Before Scoop

Line up the food at the back of the plate. The plate will rotate automatically half a turn before scooping. This is helpful to profiles who are too low down to see food at the front of the plate.

Auto plate turn setting icon

Auto Plate Turn

This turns the plate a little between each scoop. This saves you the trouble of turning the plate each time.

Auto turn angle setting icon

Auto Turn Angle

If you have selected the auto plate turn option you can type in the number of degrees to turn each cycle. Typically 25 degrees is recommended. When you adjust this, the plate will automatically turn that amount to demonstrate - as long as the partition plate is not fitted.

Partitioned plate options icon

Partitioned Plate Options

Select this option to access partitioned plate turn settings detailed below: (Partitioned Plate feature must be enabled - contact your Neater supplier for details)

Voice control microphone icon

Voice Control Plate Turn

With voice control enabled, say Plate Left or Plate Right to turn the plate a little (the angle of rotation is as set for auto plate turn ). Turn the Plate starts continuous rotation of the plate until you say: Stop. Quarter turn, Third turn and Half turn turn a quarter, third or half a turn.


3.8 PARTITIONED PLATE SETTINGS

Auto next partition turn icon

Auto Next Partition

This turns the plate to the next partition between each scoop. This saves you the trouble of turning the plate each time if you want variety between each mouthful.

Enable fine plate turn icon

Enable Fine Turn

A long press of the middle button turns the plate within the partition so that food can be lined up accurately for scooping. This can be used when the spoon has missed or moved some food. You will need to be able to see the food in the plate and have good control of the switches to use this feature.

3.9 MORE SETTINGS

Click to play videoPlay video icon

Spoon angle setting icon

Spoon Angle

By default, the spoon’s angle is Fixed to best suit most profiles and keep food on the spoon. A few profiles prefer the angle to be Adjustable. The angle is then set when the mouth position is set in Learn by Hand mode.

Settings menu options icon

Device Settings

Update your app here. Jump to App Update

Button click sounds, animations and haptic feedback can be switched on or off.

Choose light or dark theme.

Change language. See the full list of Supported Languages

Switch video captions on or off.

Sounds and voice control settings icon

SOUNDS AND VOICE

Sounds

Choose between voice alerts, beep prompts and no sound prompts (videos will still play sound).

Mute volume icon Enable sound prompts icon Voice alerts volume icon

Volume is adjusted using external buttons on the display.

Record custom voice alerts icon

Voice control

You can edit all your voice control settings within this menu Jump to Voice Control


3.10 REPORTS

Reports menu icon

Report buttons access data about the Neater Eater Robot, settings you have chosen and usage. You can choose to send .csv files of the reports to your email address (copies to a secure Neater email).

Settings report icon

Settings Report

The Settings Report lists current profile settings and robot data.

Tablet battery report icon

Tablet Battery Report

The Tablet Battery Report shows a log of the tablet battery data such as charge level and temperature.

Usage report icon

Usage Report

The Usage Report shows a log of the robot usage including: scoops in, power ons, selected plates, use of snack mode, selected profile. For each profile: number of times at mouth and number of "courses" eaten. (A "Course" count is added for each change of plate, power off or use of snack mode.)

Long press the "Usage Report" button to delete individual or all profile data. (An access code is required; total robot scoops count is preserved).

Use the option to send reports by email. These can be a useful tool rehabilitation tool for therapists. Software and links can be provided to analyse data.


3.11 MANAGE PROFILES

Manage profiles menu icon
Select profile icon

Select Profile

Select one of five profiles; each with their own settings.

Voice control profile selection icon

With voice control turned on, you can select other voice control enabled profiles, using your voice.


Renaming Profiles

Rename profile with voice icon Profile name options icon

Press and hold a profile symbol and follow on-screen instruction for name changing. Each profile has a displayed name and a name that can be used to select the profile using voice control (if voice control is already enabled or is enabled later). When you choose the option Voice record name you will be asked to say a phrase and to repeat it. You will then be asked if you want to use the phrase detected as the displayed name. The robot may detect different words than you intended, but you can go back and Edit text displayed.

Options at start menu icon

Options at Start

To speed up start-up, you can adjust the following settings:
•Profile selection: Skip choosing a profile; the robot will use the last profile in use.
•Plate selection: Skip choosing a plate; the robot will use the last plate in use.
•Introduction video: Choose whether to play the introduction video at start-up.

Copy profile settings icon

Copy Profile

Copy the current profile's settings to other profiles.

Reset single profile icon

Reset Profiles

Reset a profile set-up, returning it to default settings with no name. You cannot delete the current selected profile here.

Reset all profiles icon

Reset All Profiles

This resets all profiles returning them to factory default settings with no profile names. (An access code is required). Profile 1 will then be selected as the current profile named “Neater”.

Advanced Settings

You must enter an Access code to access the Advanced Settings menu.

(Access code default is 1234. You can change this in Menu Access.)

Advanced settings menu icon

3.12 ADVANCED SETTINGS

This area cannot be accessed using voice control. You must enter an Access code. (The default is 1234. You can change this in Menu Access.)

Spoon sensitivity adjustment icon

Spoon Sensitivity

The default set-up for the sensor inside the Neater Eater enables it to detect sharp hits when the spoon is near your mouth. It should not be relied upon for safety. Adjustment can be made if false triggers occur or the sensor is failing to trigger. It can also be switched off.

Manage variables technical icon

Manage Variables

This menu allows Settings to be copied between remote computers and different Neater Eaters, reset to factory defaults and checking and changes to individual variables. Technician level access codes are required for some functions.

Exit app stop button icon

Exit App

A code is required to exit the App

Menu access lock options icon

Menu Access

Change accessibility of settings menu. Jump to Menu Access

Neater Eater robot icon

Demo Mode

Demo mode requires a PIN code to access. It is used to demonstrate some of the Neater Eater's features.

Check arm datums icon

Check Datums

Press this to check that the Neater Eater is correctly calibrated. The Neater Eater moves its three arm sections so that the arm the spoon plugs onto is horizontal and the tip of the spoon is 20mm inside and level with the current plate edge. A technician’s access code is required to reset the datum positions following on-screen instructions. (Incorrect set-up can damage the Neater Eater).

3.13 MENU ACCESS

Menu access lock options icon

Menu Lock Options

By default, immediate access to the Settings menus is allowed.

If accidental entry to Settings is likely, then you can choose to always ask for confirmation before entering Settings.

There is also an option to always ask for a PIN code to enter the Settings menus.

Access code entry icon

Access Code

Access Code change - change your PIN code for accessing Advanced Settings and accessing Settings if you have set code input as an access requirement. The initial setting is 1234.

Switch menu access options icon

Switch Menu Access

Allow access to the settings menus using external switches.

External switches 2 and 3 can then be used to index through the options; external switch 1 to select. If there is a choice of only 3 options, external switch 1 is option 1, 2 is 2 and 3 is 3. Yes or No questions can be answered with external switch 1 for Yes and 3 for No.

Speed up start setting icon

Speed Up Start

When the spoon moves to check your mouth position, clicking button 1 continues on to check the plate. With Speed Up Start enabled, press and hold button 1 until the icon highlights orange to immediately select the plate last used so you can scoop food straight away. The plate last used is displayed at the top of the screen. (Partition positions will still be checked for Partition Plate.)

Another Speed Up feature is also enabled: when wiping the spoon the plate will no longer turn round to where the food was scooped from and then turn back again. (Soup Bowl and partitioned plates do not turn to wipe anyway.)

Auto power off setting icon

Auto Power Off

If the Neater Eater is idle for 15 minutes it will automatically start to shutdown to save energy. Here you can switch off or re-enable this feature.

3.14 BLUETOOTH SETTINGS

Bluetooth settings menu icon

Reset Bluetooth connection icon

Reset Bluetooth

Reset the robot too tablet Bluetooth connection. Ensure the robot is switched on. You will be asked to choose a "V6 robot" from the available devices list.

Add Bluetooth device icon

Add Bluetooth Device

Other input control devices can be connected. For instance, a Bluetooth mouse or joystick can be used to remotely control the tablet.

Bluetooth switches icon

Bluetooth Switches

Other input control devices can be connected. For instance, a Bluetooth mouse or joystick can be used to remotely control the tablet.

4.1 TROUBLESHOOTING

Troubleshooting robot icon

PROBLEM?

The first thing to do if you have any problem is to reboot the tablet and the robot (turning them off and on again):

1. Ensure the robot and the tablet are charged.

2. Hold the wake/sleep button and the volume up button on the tablet at the same until the tablet vibrates. It is restarting.

3. Hold the front button on the robot until the light goes off (15 secs). Press the button again to light it up. The robot is restarting.

4. Wait two minutes for both the tablet and the robot to restart and connect to each other. (The blue LED at back of robot indicates Bluetooth connection)

Click to play restart instructions videoPlay video icon

Robot won't turn on?

If the Robot battery is not charged for a long period of time and the orange LED on the back of the robot flashes when plugged in and getting power from the wall, reset the battery charging: With the robot plugged in, press a pin into the hole near the power socket for up to 1 minute, three times. This resets a protection circuit that may have disconnected the batteries.

Hungry feed me icon

Hungry?

Enable Voice Control and try saying: Neater feed me or Robot feed me.


General tablet settings icon

As with most computers, occasional rebooting of the tablet maintains its reliability. Periodically it will invite you to restart it.

Hold the tablet's sleep/power button for 2 seconds until the menu appears and choose "Restart".


Food scooping problems warning icon

Food Scooping Problems

Make sure food is chopped up to be roughly smaller than the spoon you are using for scooping. Large pieces of food can fall off the spoon pulling other food with them. Sticky food can sometimes stick to itself and the plate rather than the spoon or too much can be scooped onto the spoon for you to eat. Try using a smaller spoon or switch on Plate Jiggle and Auto Scoop Less Food.


4.2 BLUETOOTH NOT CONNECTED

Bluetooth not connected warning icon

Make sure the Neater Eater Robot is switched on by pressing the button on the front. The light in the switch shows it is on. If it does not light, the batteries may be very low. Plug in the power supply at the back and try again. If Bluetooth remains not connected for a long time, the tablet will prompt you to restart the robot and the tablet. Make sure there are no other Neater Eater robots or tablets that might be connected to robots switched on anywhere nearby.

Reset Bluetooth connection icon

If the above steps are unsuccessful, wait two minutes until the Bluetooth reset icon appears at the top of left hand corner of the tablet, press it and follow the instructions:


If you still cannot connect the tablet to the robot, contact your Neater dealer.


QR code to read instructions online Scan QR code to read these instructions online on your phone

4.3 APP UPDATE

App Update - Scroll to the bottom of Device Settings and select "Update the app". Follow on-screen prompts; you will need access to Wi-Fi. After update and install, press the tablet power button for 2 seconds and choose Restart.

4.4 CLEANING AND MAINTENANCE

4.5 BATTERY SAFETY & CARE

4.6 CYBERSECURITY & TABLET GUIDELINES

The tablet is considered an integral part of the Neater Eater Robotic. To ensure patient safety, protect sensitive data, and maintain the integrity of the device, the operator must adhere to the following cybersecurity guidelines:

4.7 DISPOSAL AND WEEE GUIDELINES

4.8 INCIDENT REPORTING (REPORTING SERIOUS INCIDENTS)

Any serious incident or adverse event occurring in relation to the Neater Eater Robotic (NER) must be reported immediately to Neater Solutions Ltd: Email: info@neater.co.uk Phone: +44(0)1298 930123

Regulatory Reporting:

4.9 RESIDUAL RISKS

5.1 SUPPORTED LANGUAGES

The following languages are supported with text. Languages marked include support for voice control (requires an add-on download when voice control is selected). Voice Control can learn custom commands using any language. Please let us know of any suggestions for translation improvements: info@neater.co.uk

5.2 TECHNICAL FILE

Feature Specification
Model / Name Neater Eater Robotic V6
Manufacturer NEATER SOLUTIONS LIMITED
12 Burlington Road, Buxton, Derbyshire, SK17 9AL, United Kingdom
EU Authorised Representative Euan McLoughlin
Unit 48, BT36 4GN, Northern Ireland
Email: em@neater.co.uk
UDI-DI 5065005316001
Medical Device Classification Class I, active, non-sterile & non-measuring.
Biocompatibility Latex-Free / BPA-Free
Expected Service Life 5 years (subject to maintenance)
Warranty 3 years excluding consumables
Disposal Electronic Waste (Do not discard in trash)
Operating, Storage & transport Temperature & Humidity 12° to 60°C, 15% to 93% humidity (short duration)
12° to 30°C, 40% to 55% humidity (recommended)
Dimensions 450mm x 450mm x 300mm (boxed)
Weight 5.5Kg
Powered items: Yes
Battery type & capacity Lithium ion (62.4Wh / 5.2Ah)
Battery life per charge 180 minutes continuous scooping
Electrical Input 12V ⎓ 5.0A (Max)
Electrical output 5V ⎓ 2.0A (Max)
Peak Power 12V ⎓ 5.0A (Max)
Power Connector 2.1mm DC Power Plug
Electric Shock Protection Class III Electrical Equipment (Extra Low Voltage)
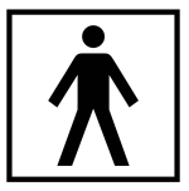
Applied Part Type BF: Plastic, Ceramic, Metal cutlery/Crockery
Ingress Protection IP21; safety protected against:
• solid objects over 12.5mm
• vertically falling drops of water or condensation
Food Safe Components Crockery & Cutlery
Food Safe Materials Ceramics, stainless steel, polypropylene, copolyester.
Dishwasher safe components Crockery & Cutlery
Microwave safe components Crockery (use plate stand)
Lowest Food/Drink Delivery Height (to mounting) 100mm
Maximum Food Delivery Height 435mm
Maximum Horizontal Reach 560mm

5.3 SYMBOLS GLOSSARY

Title Symbol
Authorised EU Representative Authorised EU Representative symbol
Caution; Indicates that caution is necessary when operating the device or to avoid undesirable consequences. Caution symbol
CE mark CE Mark symbol
Fragile Fragile handling symbol
Instruction manual/booklet must be read Must Read Instructions symbol
Keep dry Keep Dry symbol
Latex Free Latex Free symbol
Manufacturer Manufacturer symbol
Date of Manufacture Date of Manufacture symbol

Medical Device Medical Device symbol
Serial Number Serial Number symbol
This way up This Way Up symbol
Unique Device Identification Unique Device Identification symbol
UK MDR 2002 UKCA Mark symbol
Power related:
Battery - Li-ion Li-ion Battery symbol
Battery - Li-ion - transport packaging label UN3481 Li-ion Battery transport symbol
Electric Shock Protection (applied part BF) Type BF Applied Part symbol
Class III Electrical Equipment Class III Equipment symbol
Electrical input/output DC Direct Current DC symbol
Power connector; USB. USB Power Connector symbol
Waste Electrical and Electronic Equipment - do not bin in general waste. WEEE Do not dispose in general waste symbol